Grabbing Images
In order to analyze images with Groundlight, you first need to capture images from a camera or other image source. This guide will show you how to capture images from different sources and formats.
Framegrab
For a unified interface to many different kinds of image sources, see framegrab, an open-source python library maintained by Groundlight.
Capturing Images
Framegrab has many useful features for working with cameras and other image sources. It provides a single interface for extracting images from many different image sources, including generic USB cameras (such as webcams), RTSP streams, HTTP live streams, YouTube live streams, Basler USB cameras, Basler GigE cameras, and Intel RealSense depth cameras.
Installation is straightforward:
pip install framegrab[all]
To capture frames, first configure a FrameGrabber object, specifying the image source. Then call the grab() method to capture a frame:
from framegrab import FrameGrabber

# Create a FrameGrabber for a generic USB camera (e.g., a webcam)
config = {
    'input_type': 'generic_usb',
}
grabber = FrameGrabber.create_grabber(config)

frame = grabber.grab()
Framegrab returns images as numpy arrays in BGR format, which is the standard format for OpenCV. This makes it easy to use the images with other image processing libraries, such as OpenCV.
See the framegrab documentation for more information on configuring different image sources.
Motion Detection
Framegrab also includes a motion detection module, which can be used to detect motion in a video stream. This can be useful for detecting when something changes in a scene, such as when a person enters a room or a car pulls into a parking space.
To use the built-in motion detection functionality, first create a MotionDetector object, specifying the percentage threshold for motion detection. Then, use the motion_detected() method with every captured frame to check if motion has been detected:
from framegrab import FrameGrabber, MotionDetector

config = {'input_type': 'generic_usb'}
grabber = FrameGrabber.create_grabber(config)

motion_threshold = 1.0
mdet = MotionDetector(pct_threshold=motion_threshold)

while True:
    frame = grabber.grab()
    if frame is None:
        print("No frame captured!")
        continue

    if mdet.motion_detected(frame):
        print("Motion detected!")
In this example, motion_threshold specifies the sensitivity level for detecting motion based on the percentage of pixels that have changed. By default, this is set to 1.0, indicating a 1% change. To increase the sensitivity, set the threshold to a lower value, such as 0.5%. Likewise, to decrease the sensitivity, set the threshold to a higher value, such as 2%.
Image Formats
Groundlight's SDK accepts images in many popular formats, including PIL, OpenCV, and numpy arrays.
PIL
The Groundlight SDK can accept PIL images directly in submit_image_query. Here's an example:
from groundlight import Groundlight
from PIL import Image

gl = Groundlight()
det = gl.get_or_create_detector(name="path-clear", query="Is the path clear?")
pil_img = Image.open("./docs/static/img/doorway.jpg")
gl.submit_image_query(det, pil_img)
OpenCV
OpenCV is a popular image processing library, with many utilities for working with images.
OpenCV images are stored as numpy arrays. (Note they are stored in BGR order, not RGB order, but as of Groundlight SDK v0.8 this is the expected order.)
OpenCV's images can be send directly to submit_image_query as follows:
import cv2

cam = cv2.VideoCapture(0)  # Initialize camera (0 is the default index)

_, frame = cam.read()  # Capture one frame
gl.submit_image_query(detector, frame)  # Send the frame to Groundlight
cam.release()  # Release the camera
Numpy
The Groundlight SDK can accept images as numpy arrays. They should be in the standard HWN format in BGR color order, matching OpenCV standards.
Pixel values should be from 0-255 (not 0.0-1.0 as floats). So uint8 data type is preferable since it saves memory.
Here's sample code to create an 800x600 random image in numpy:
import numpy as np

np_img = np.random.uniform(low=0, high=255, size=(600, 800, 3)).astype(np.uint8)
# Note: channel order is interpretted as BGR not RGB
gl.submit_image_query(detector, np_img)
Channel order: BGR vs RGB
Groundlight expects images in BGR order, because this is standard for OpenCV, which uses numpy arrays as image storage. (OpenCV uses BGR because it was originally developed decades ago for compatibility with the BGR color format used by many cameras and image processing hardware at the time of its creation.) Most other image libraries use RGB order, so if you are using images as numpy arrays which did not originate from OpenCV you likely need to reverse the channel order before sending the images to Groundlight. Note this change was made in v0.8 of the Groundlight SDK - in previous versions, RGB order was expected.
If you have an RGB array, you must reverse the channel order before sending it to Groundlight, like:
# Convert numpy image in RGB channel order to BGR order
bgr_img = rgb_img[:, :, ::-1]
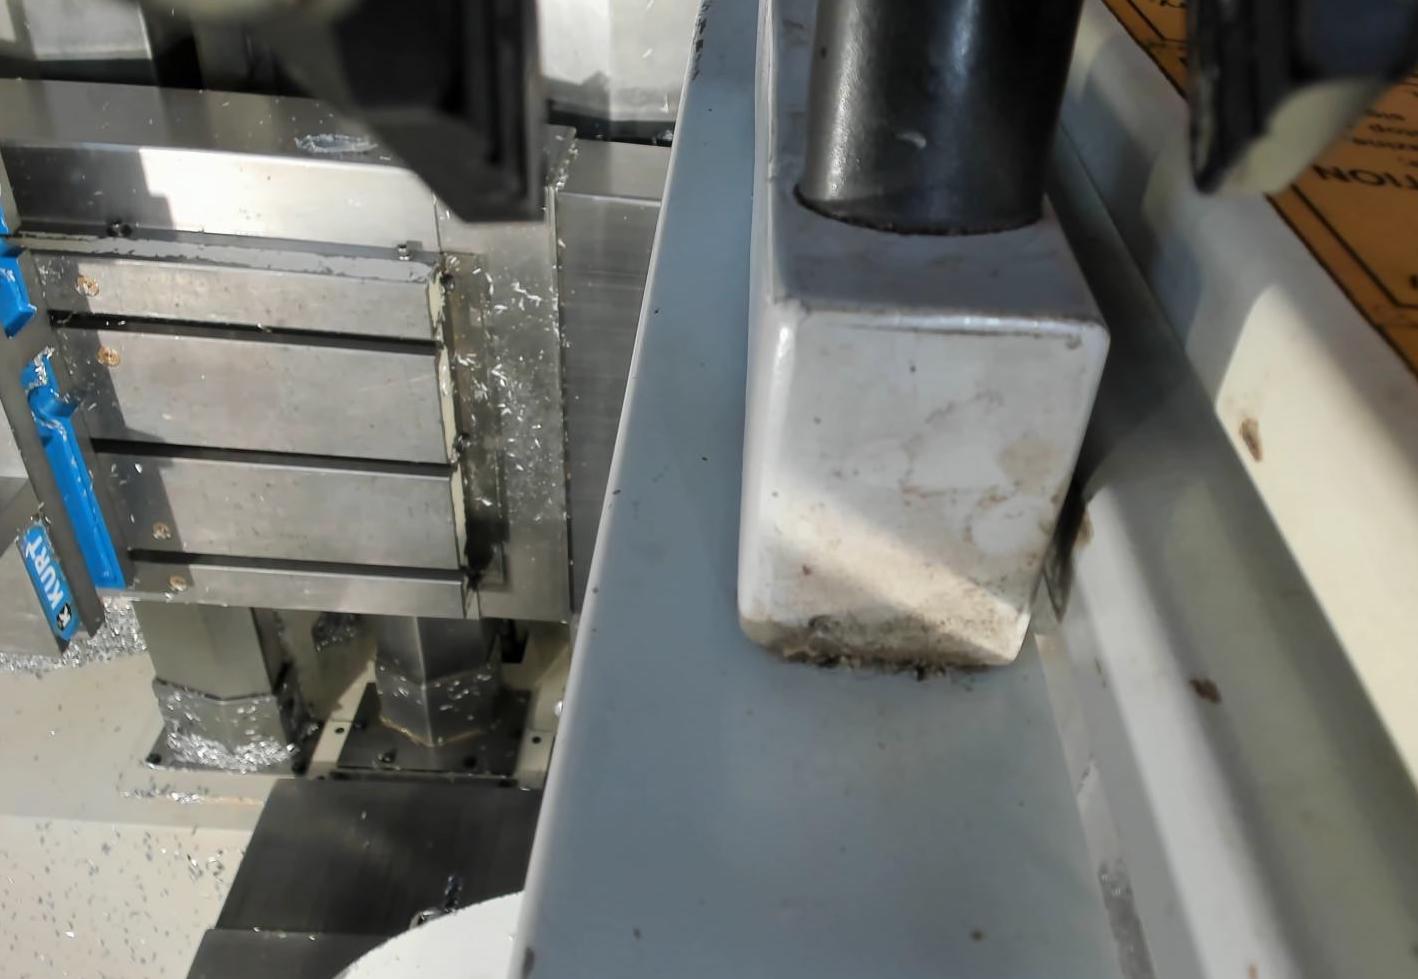
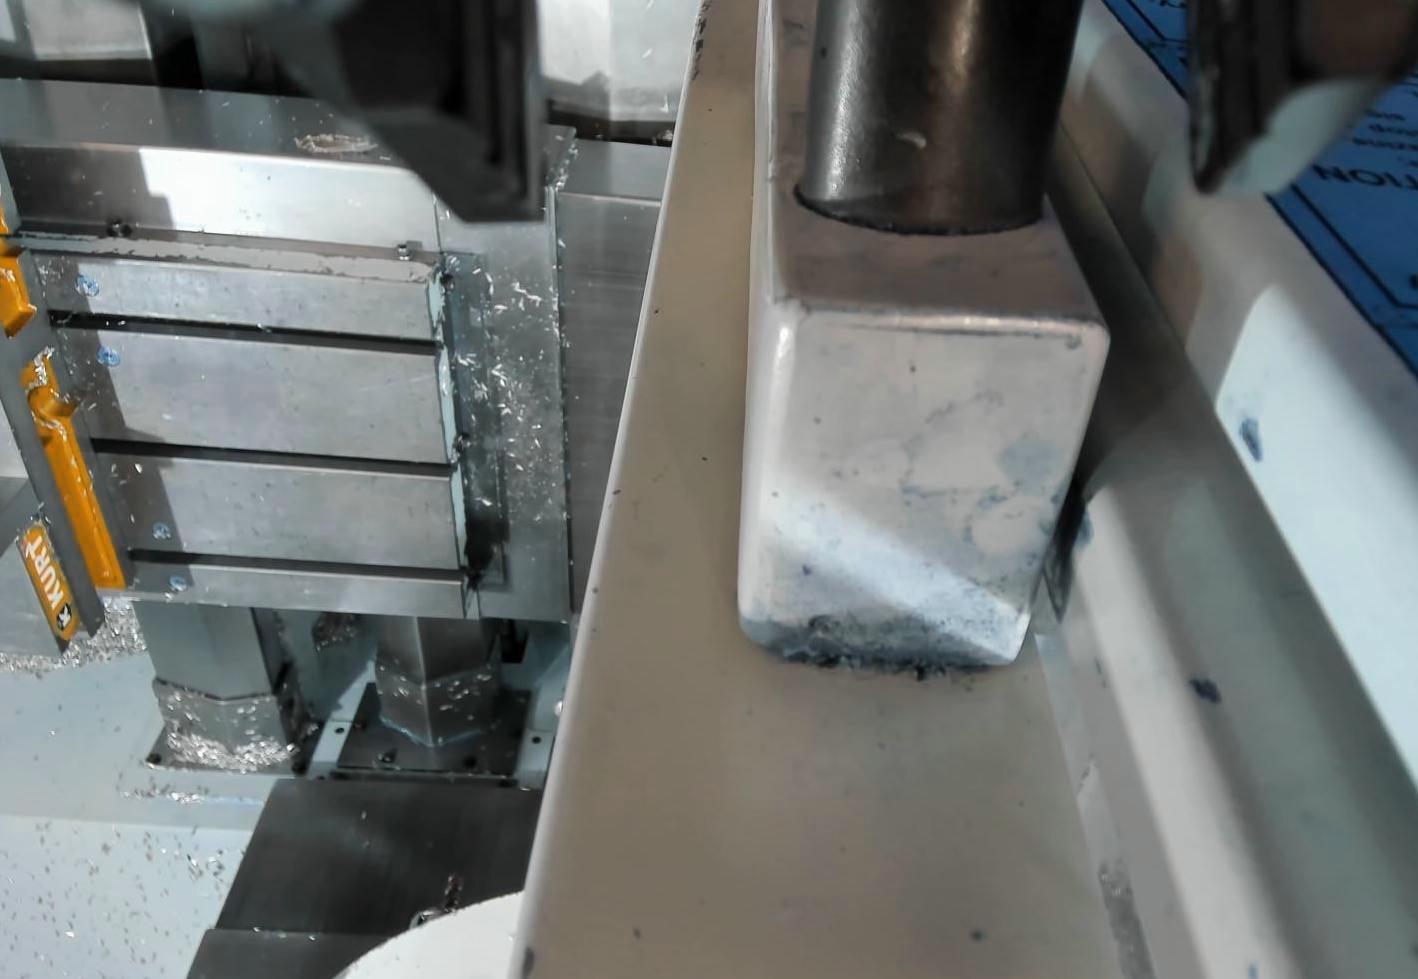
The difference can be surprisingly subtle when red and blue get swapped. Often images just look a little off, but sometimes they look very wrong.
Here's an example of a natural-scene image where you might think the color balance is just off:


In industrial settings, the difference can be almost impossible to detect without prior knowledge of the scene:

